


"Here to Help" is a support column written especially for Formstack's awesome, loyal customers.
Whether you use Formstack for internal workflow processes like employee onboarding or for marketing purposes like lead generation, online quizzes can be a powerful part of your toolkit. You might build an online quiz to test a new employee’s knowledge of company policies and procedures, or you might build an engaging quiz related to your product offerings to draw users to your site.No matter your purpose, the ability to create online quizzes quickly and easily is likely high on your list. Did you know it’s possible to build a graded online quiz using a Formstack form? Plus, with Formstack, you get so much more than a basic quiz. You get the ability to make your quiz look great and embed it seamlessly onto websites and social media pages. And you get a user-friendly dashboard that lets you view all the scores and answers. If you’re not sure how to get started with building online quizzes in Formstack, don’t worry! Here are 4 easy steps that prove Formstack is an awesome online quiz maker:
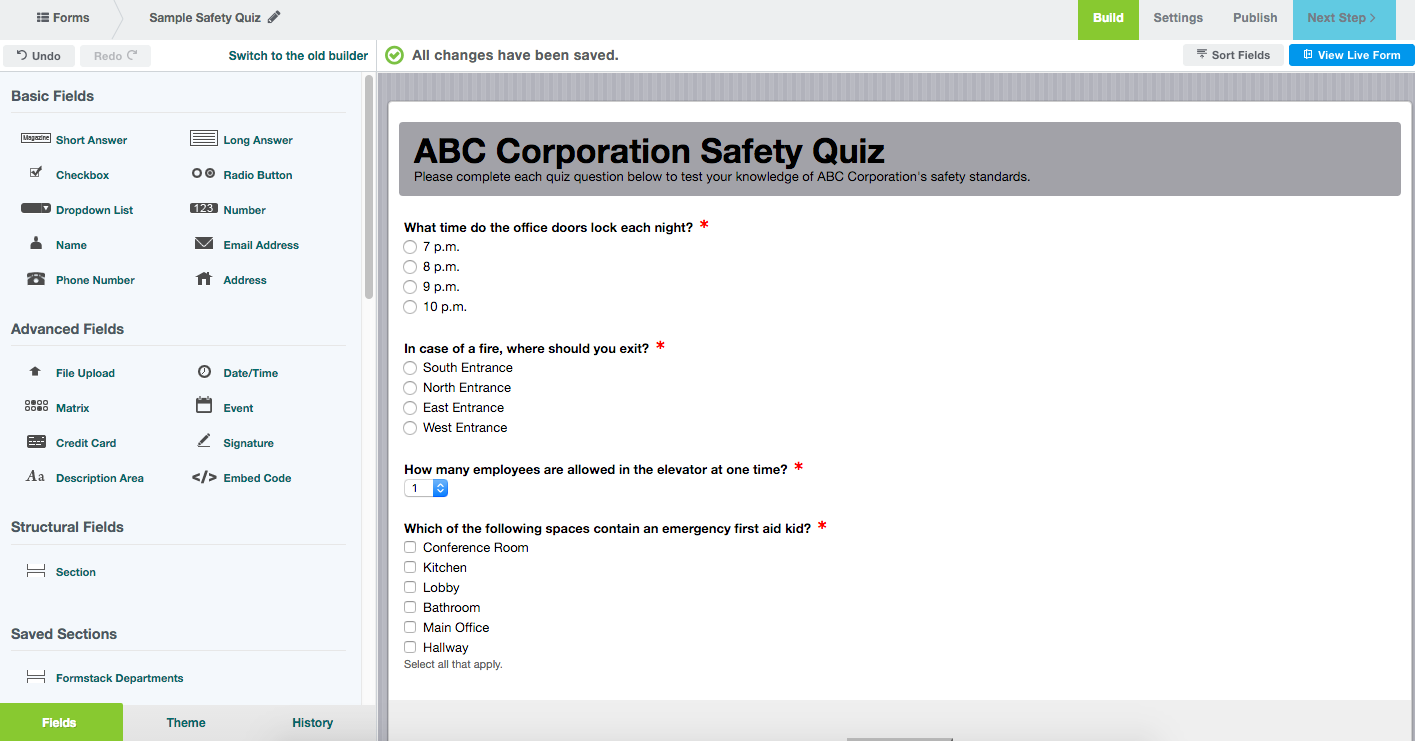
Step 1: Build Your Quiz Form
To start building your graded online quiz, create a new form, add a quiz header and instructions, and add your questions. In order to calculate a score on your Formstack quiz form, your questions must be multiple choice. To add multiple choice quiz questions to your form, use any of the following form fields:
- Radio Button
- Dropdown List
- Checkbox
Step 2: Add Values to Your Quiz Questions
Next, you need to set a point value for each question so that a final score can be calculated upon completion. To do this, take a few simple actions:
- Click on your question.
- Navigate to the Advanced Options Editor under Options.
- Select Use Separate Values under List Options.
- Add a point value next to each answer choice.
You will likely come across instances when you have several answer choices that need to be set to the same value (such as 1 for all correct answer choices in a multi-select question or 0 for all incorrect answer choices in any question). However, the values for each answer choice in a question must be unique. If you need to use the same value for more than one answer choice, use variations, such as 0, 0.0, and 0.00.
Note: If you have a Checkbox field with a Check All option, the values from all the options in that field will be combined to give an overall point value for that question.
Step 3: Create a Final Score Calculation
Next, you need to add a self-calculating field to your quiz form to display the final score. To do this, follow these quick steps:
- Add a Short Answer or Number field to your quiz form.
- Set the field to Read-Only under Field Options so users can’t tweak their scores.
- Navigate to Default Value and select Use Calculation.
- In the calculation box, select the first question from the dropdown menu, add a + sign, and repeat until all questions have been added.
Note: You can hide the final score from view on the actual form by selecting Hidden under Field Options.
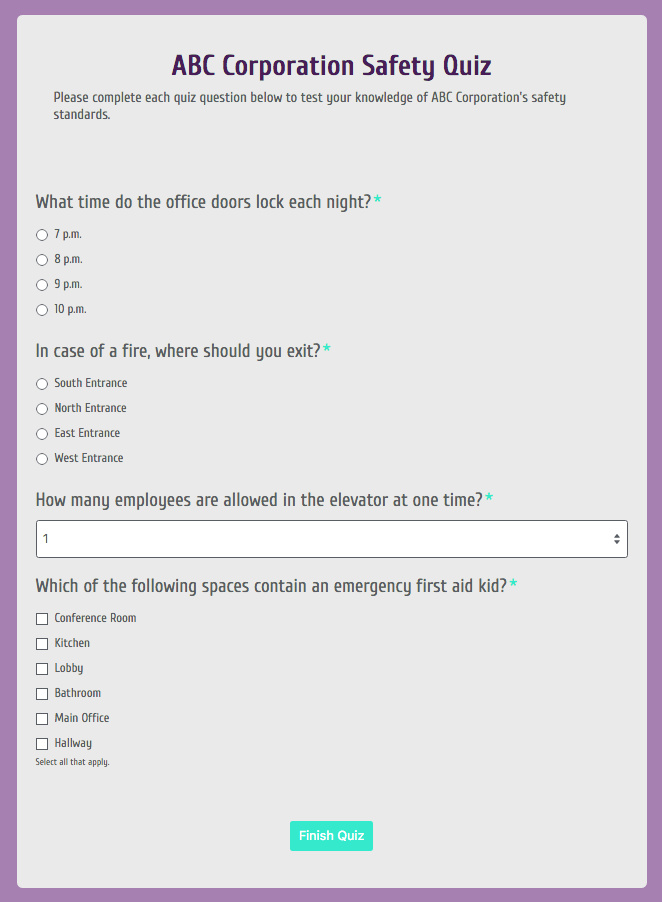
Step 4: Make Final Tweaks to Design and Functionality
Once you have your graded online quiz all set up, you can turn your attention to other things—like design and submit actions. Formstack’s Theme Editor allows you to customize the look and feel of your quiz to fit your brand or showcase the quiz topic. You can change the color of nearly every element as well as update font type and size.
Note: While you’re busy making your form beautiful, you might also want to tweak your submit button copy so that it says something relevant like Finish Quiz rather than Submit Form.
Lastly, if you want quiz takers to see their final score after submission, Formstack gives you a few options:
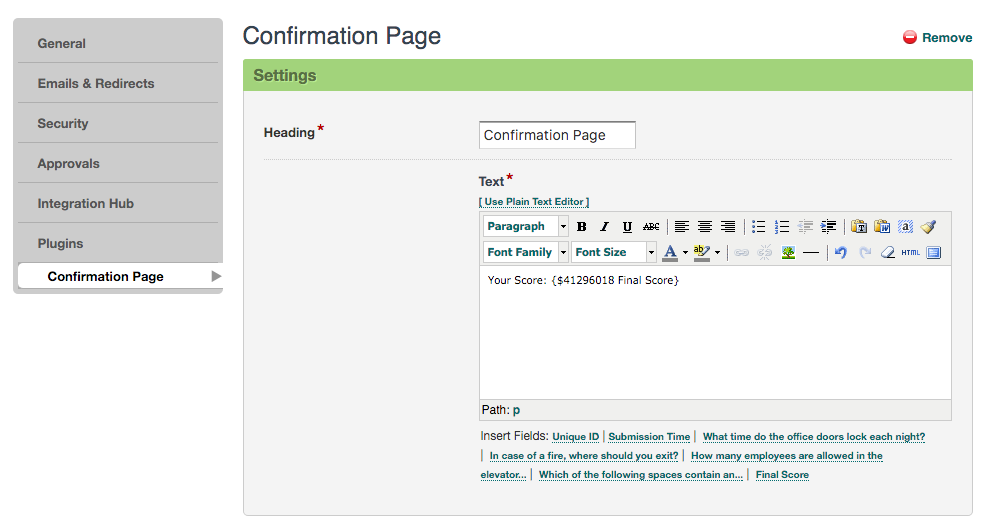
1. Confirmation Page: To display the score on the Confirmation Page, add a Confirmation Page via Settings > Plugins > Utilities. On the Confirmation Page, you can add the score field via the variables at the bottom of the editor. You will still need to type the label (e.g., Your Score), but that field will display the correct total score for each individual submitter.
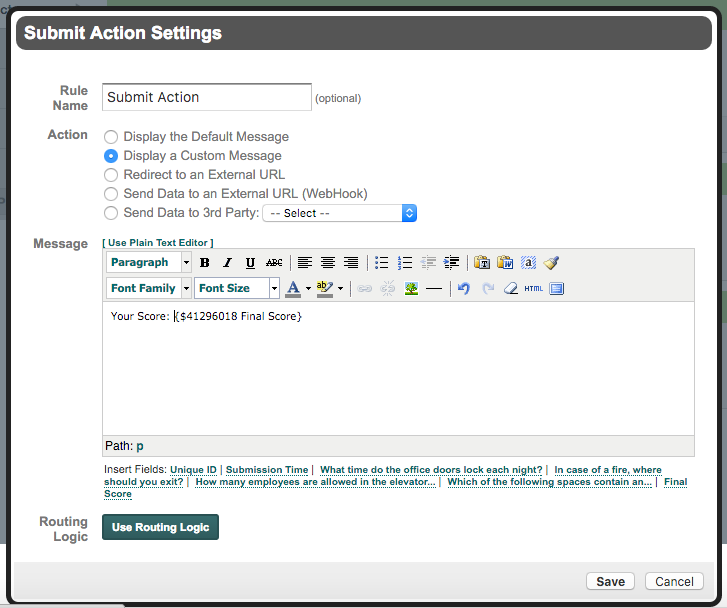
2. Custom Thank You Message: To display the score on the custom thank you message, go to Settings > Emails & Redirects > After the Form is Submitted. Click to add a new Submit Action and select Display a Custom Message. Just as mentioned above for the Confirmation Page, you can add the score field variable here. When you are done with your message, make sure to save your settings. Like the Confirmation Page, individuals will see their own score in place of that variable.
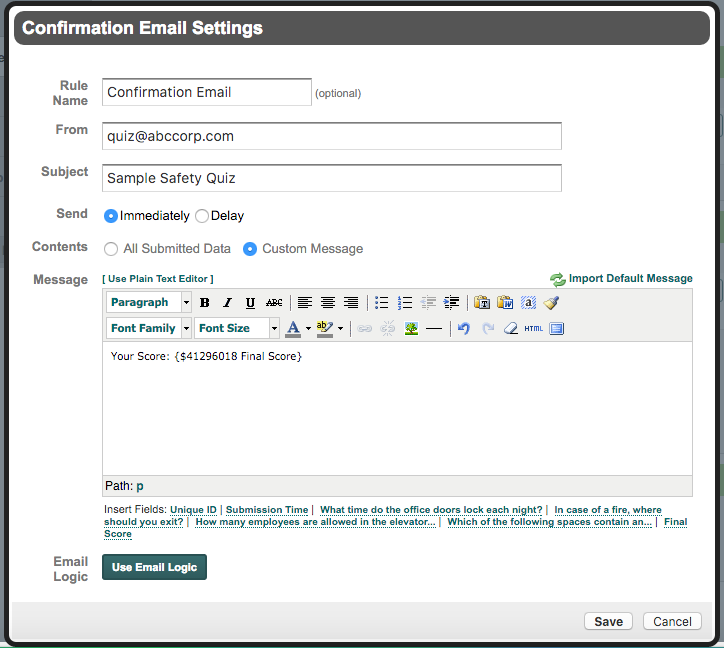
3. Confirmation Email: To display the score in the Confirmation Email, go to Settings > Emails & Redirects and click to add or edit your Confirmation Email. Once in the email, select Custom Message next to Contents and add the score field variable just as described for the first two options. A user’s score will then be emailed directly to him or her upon submission of the quiz.
If you’re using online quizzes for marketing purposes, check out the resource below to gather tips on generating leads and growing your email list with quizzes.


